Back to school: what a sweet phrase that is! Max heads back to preschool (Pre-K, to be exact) and his little sister, Georgia, heads to a toddler program. Even though it’s been an insanely busy summer and I haven’t sewn in months, I knew that I couldn’t send the kiddos to school without some handmade decked-out backpacks. It was a great excuse for me to take the time to do some sewing again.
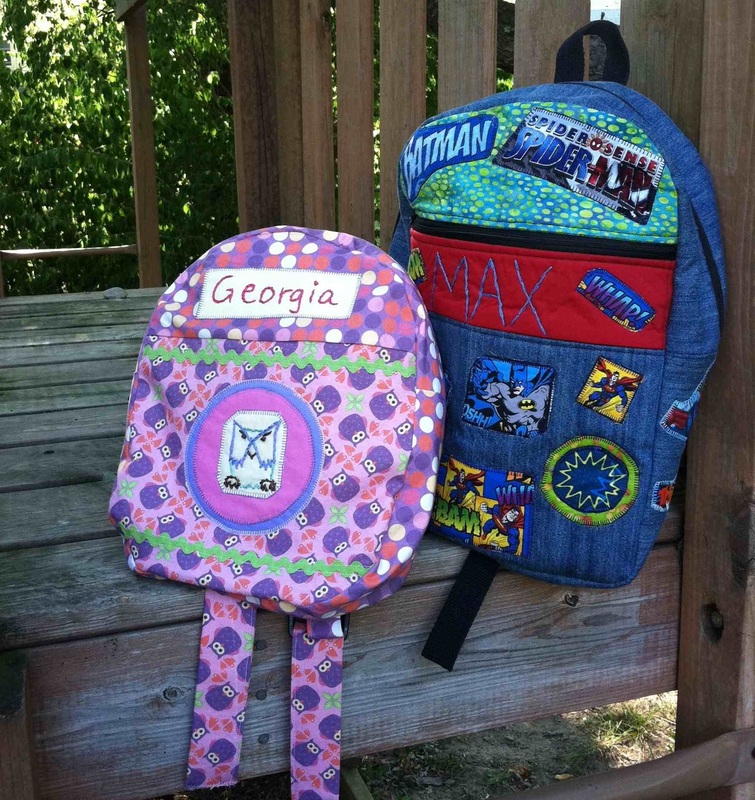
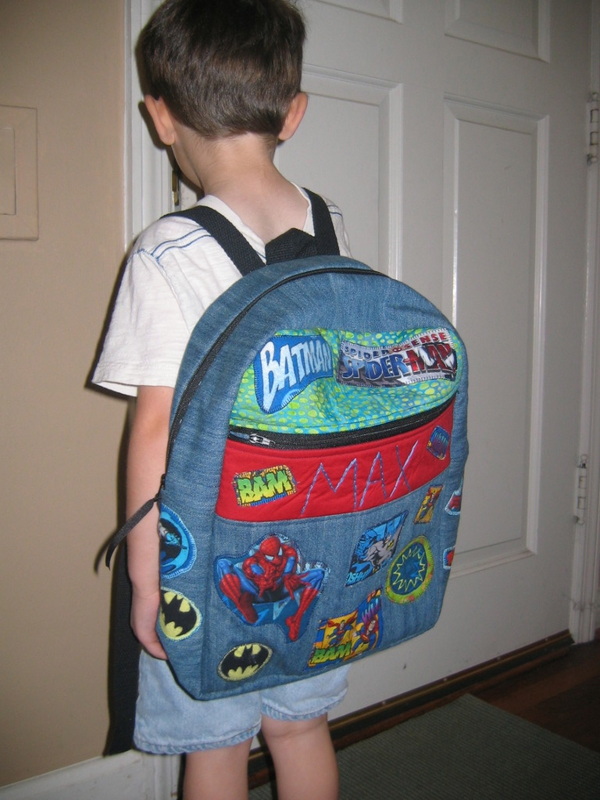
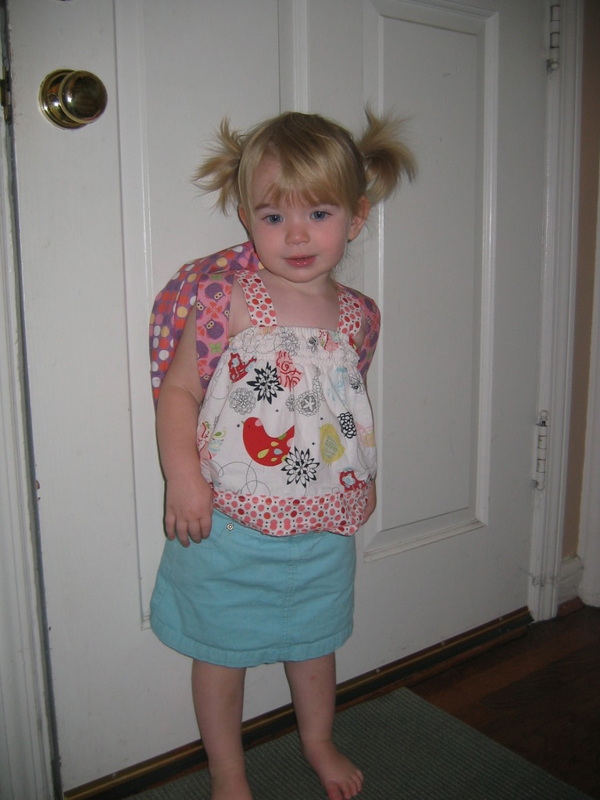
Georgia, bless her heart, has no idea that school is about to happen, or what in the world she needs with this backpack thing (she’s 2). But Max (4) had a very specific request for his back. He loved his Penguin Backpack from last year, but this year, he was ready for something a bit more grown up. And he knew exactly what. “I want Batman on one side, and Spiderman on the other. And mama, Superman too, if you can fit him.” No problem, kiddo!
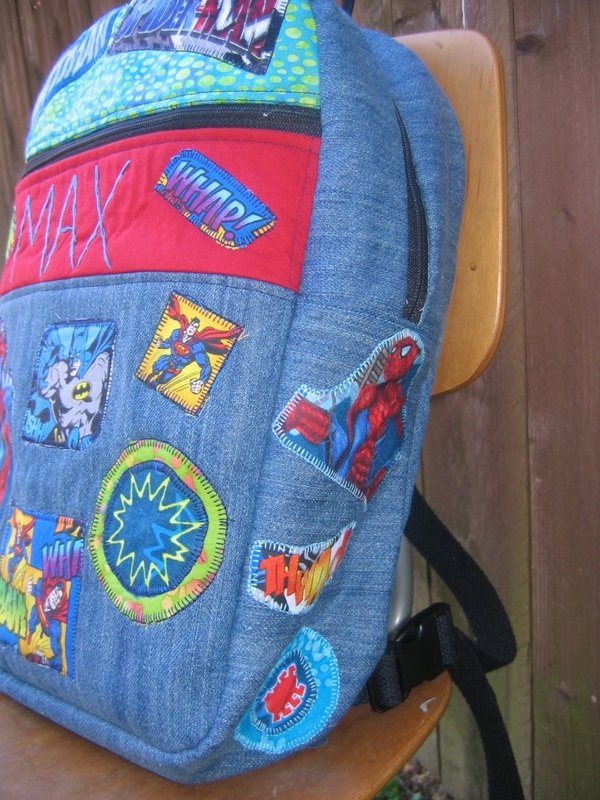
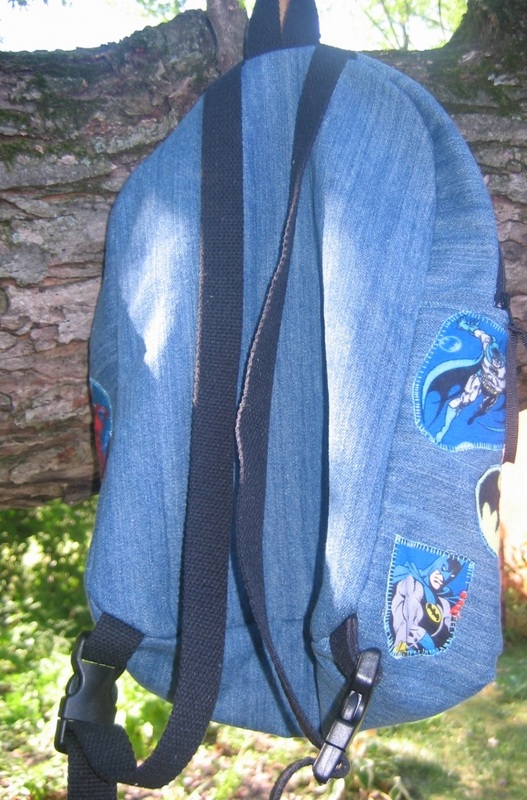
Now, all summer long, my husband had been taunting me with back-to-school ads that show various superhero backpacks. “You could just buy one and be done now . . .,” he kept saying. As if. Do you even know me, dude? For Max, it took a while to find the right pattern (the toddler and preschool backpack tutorials I kept finding all looked too small). I actually wound up using Simplicity 1823. It’s quite girly looking on the pattern envelope, but I knew that I could boy it up with a superhero theme. I found some Spiderman, Superman, and Batman fabrics at Jo-Ann’s, and cut out various images to make appliques. For the main body of the backpack, I decided to use a basic denim, since I wanted it to be able to take some wear and tear (and I figured it would look good with the superhero red, white, and blue palette). I lined it with an inexpensive light blue cotton. 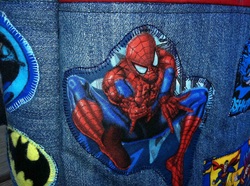 The pattern is a really good one actually: it’s very sturdy (lined, with both a layer of interfacing, and a layer of fleece). I’d say it’s a lot of sewing—not hard or complicated. Just a fair amount of seaming things together (although I was doing a bunch of appliques, so it probably felt like more sewing than it was).
I will say that there is one mistake in the pattern: it never tells you to cut out a lining piece for the front. But once I went to put the lining together, I realized I had only cut one for the back, as directed. So, I just used the back piece to cut out one for the front (the finished front is exactly the same as the back). No big deal.
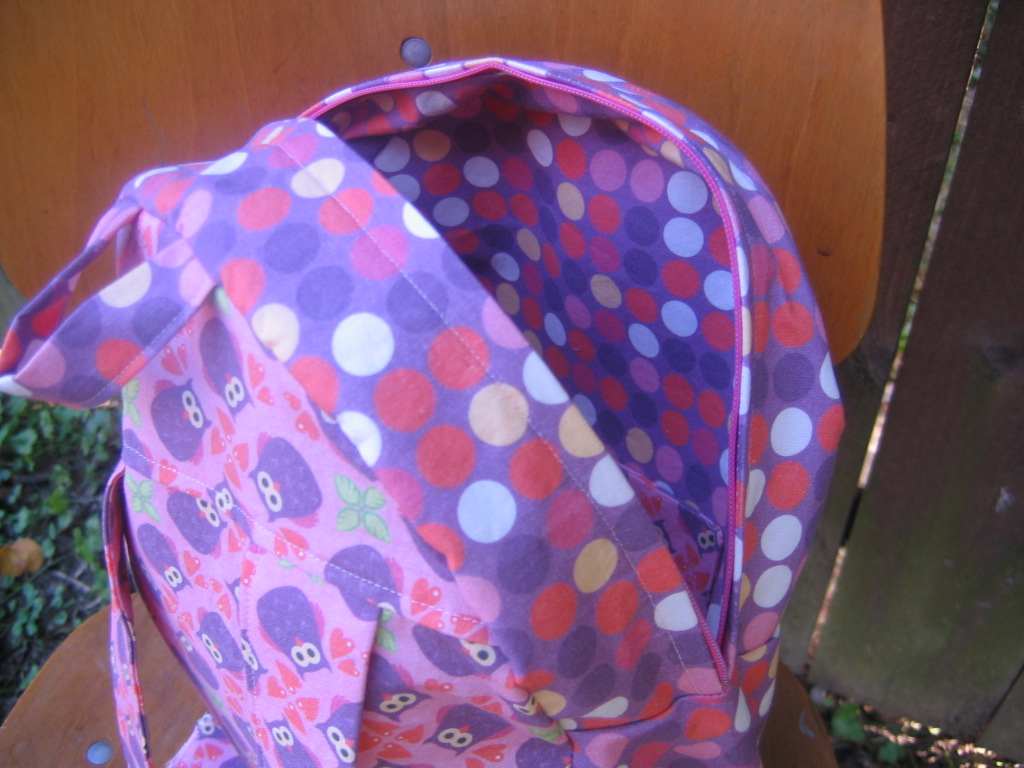
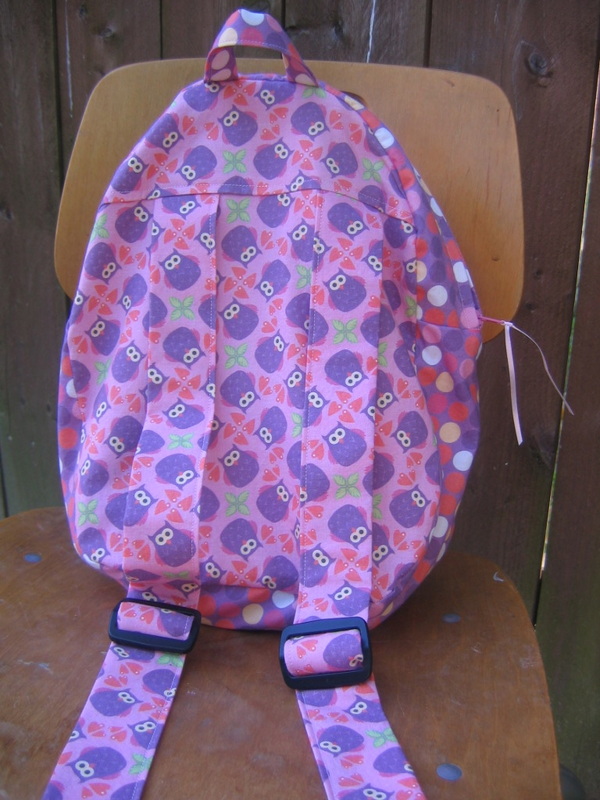
I think the appliques turned out great, and I personalized it with his name. There may be other Maxes, and there may be other superhero backpacks, but there will be no other boys named Max with this superhero backpack.  As for Georgia, I decided to go back to the wonderful Oliver + S pattern I used last year to make the Penguin Backpack (from the book Little Things to Sew). It’s smaller, but since she won’t have a homework folder or large art projects, it’s perfect. Instead of the penguin, I kept it simple, and did an owl motif. I found this fabric on Spoonflower, designed by Hamburgerliebe. I used an owl embroidery transfer from Sublime Stitching, and made a 3-layer applique, using some pink and purple solids I already had. A little rickrack, and the whole thing popped. And of course, I personalized it by appliqueing her name, too.
I highly recommend both patterns, even for beginners. I really like the way the Oliver + S pattern has you attach the lining (I wish I had used that technique to attach the lining of the superhero backpack, because it took a lot of pressing and a little tacking to get the lining to fit snugly). Don’t let the zippers scare you in either pattern. It’s really quite easy and workable to put them in. As for straps, the Simplicity pattern uses parachute clips, and the Oliver + S pattern uses traditional strap adjusters (you could do either though). Sewing backpacks for the little ones got me back in the groove of sewing. I was completely burned out after a summer of demanding deadlines and zero free time. I forgot how meditative it could be to just sit and sew in the evening. So, stay tuned for more projects, tutorials, and giveaways!
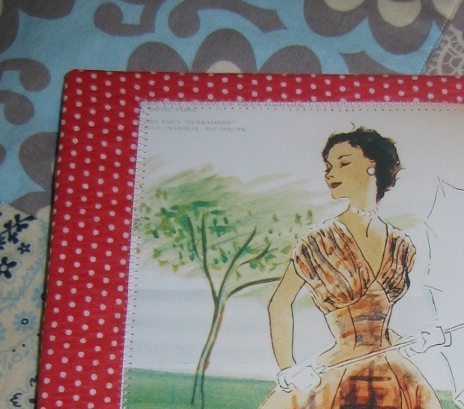
I’ve been working on a photo collage for my the wall behind my bed, incorporating all kinds of fantastic old pictures of my parents, and little pieces of vintage coolness. I knew that I wanted to incorporate some illustrations of vintage patterns with fabric, so I came up with a fun way to do it: just stitch a (paper) picture to a piece of fabric, and then use the fabric to cover a piece of blank canvas.
Super easy! 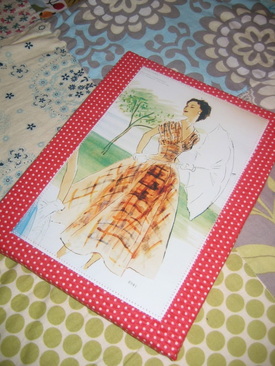 I used an illustration from Wade Laboissonniere’s book, Blueprints of Fashion. (As an aside: this is a really cool book, and I referenced it in several places in Sew Retro.) I simply cut out an illustration I liked (you could also scan, if you don’t want to cut into a perfectly good book), picked out some complementary fabric (this is a scrap of seersucker), used some double stick tape to hold the picture in place, and then carefully did a zigzag stitch all the way around.
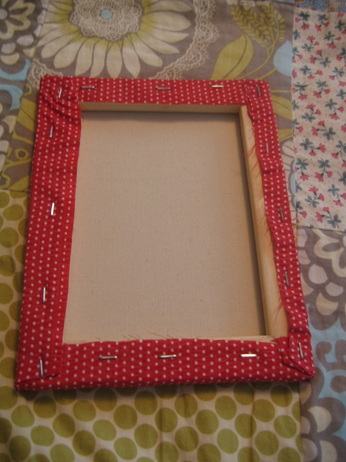
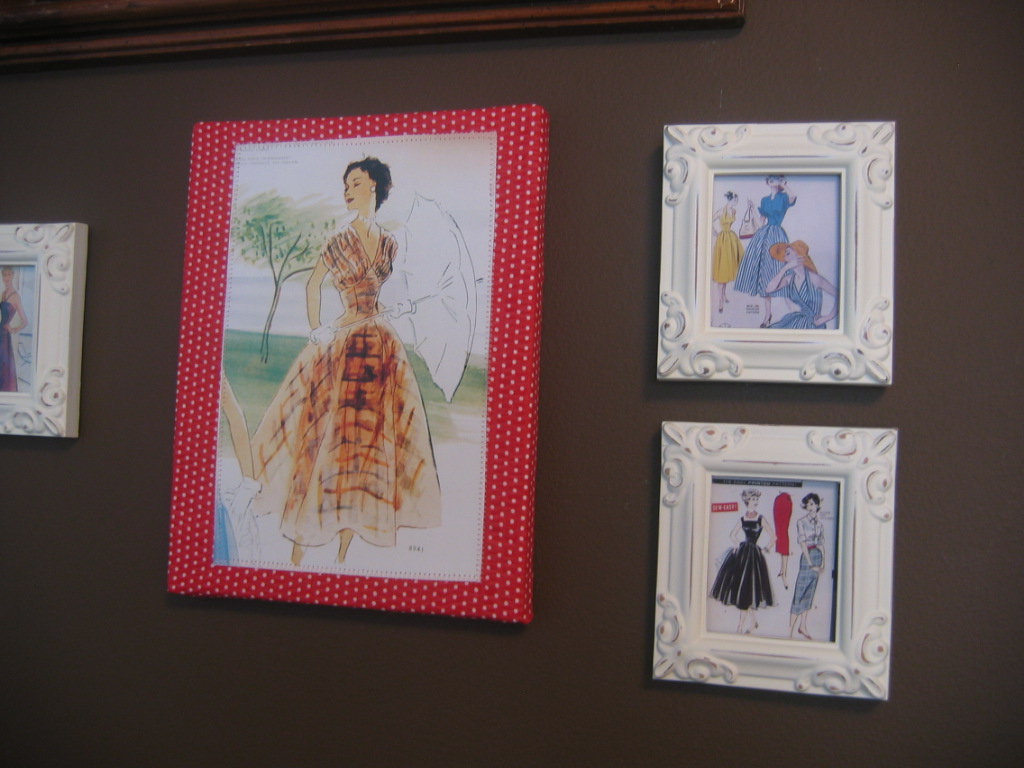
I was worried that when I pulled the fabric tight over the canvas that the stitching would pull. But it didn’t. So, when you staple the fabric over the canvas, make sure to pull it taught, and wrap your corners neatly. I love the effect, and it looks great hanging on my wall. I'm wondering how I could use this technique next . . .
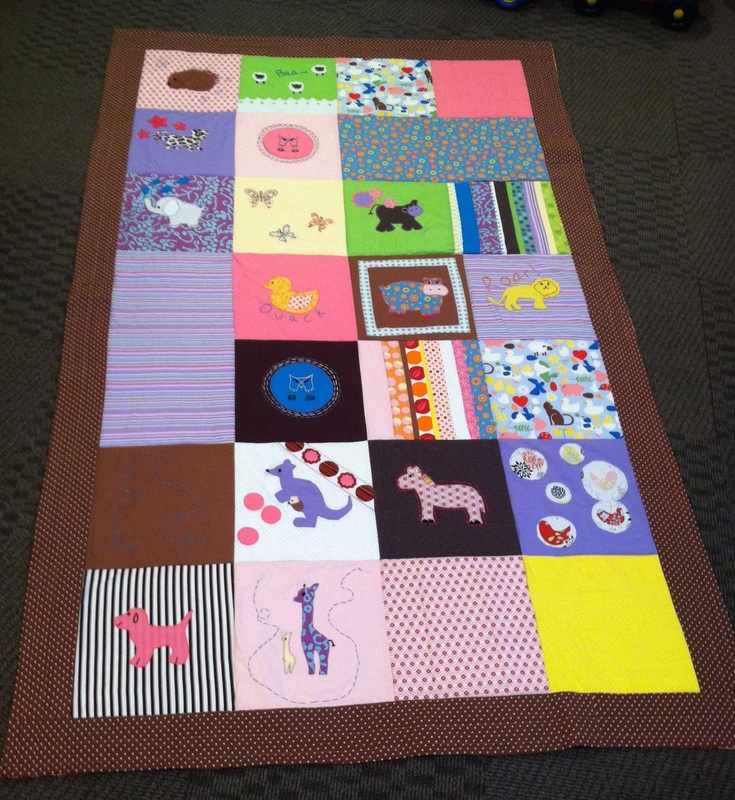
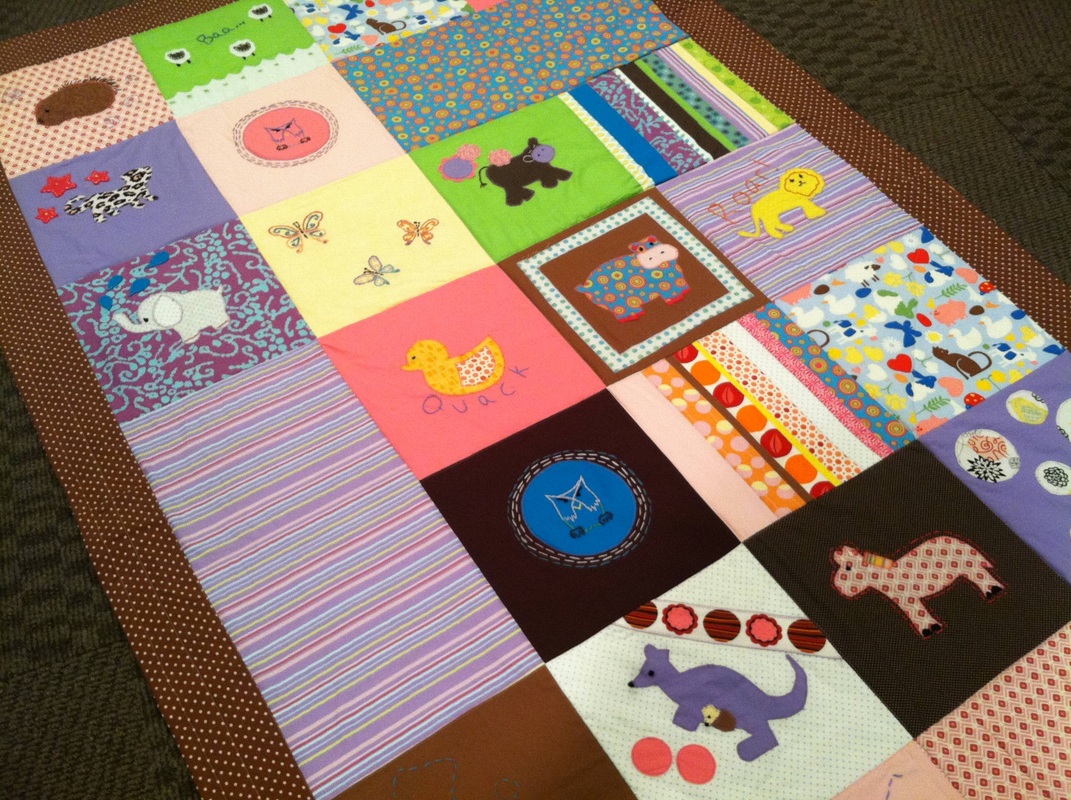
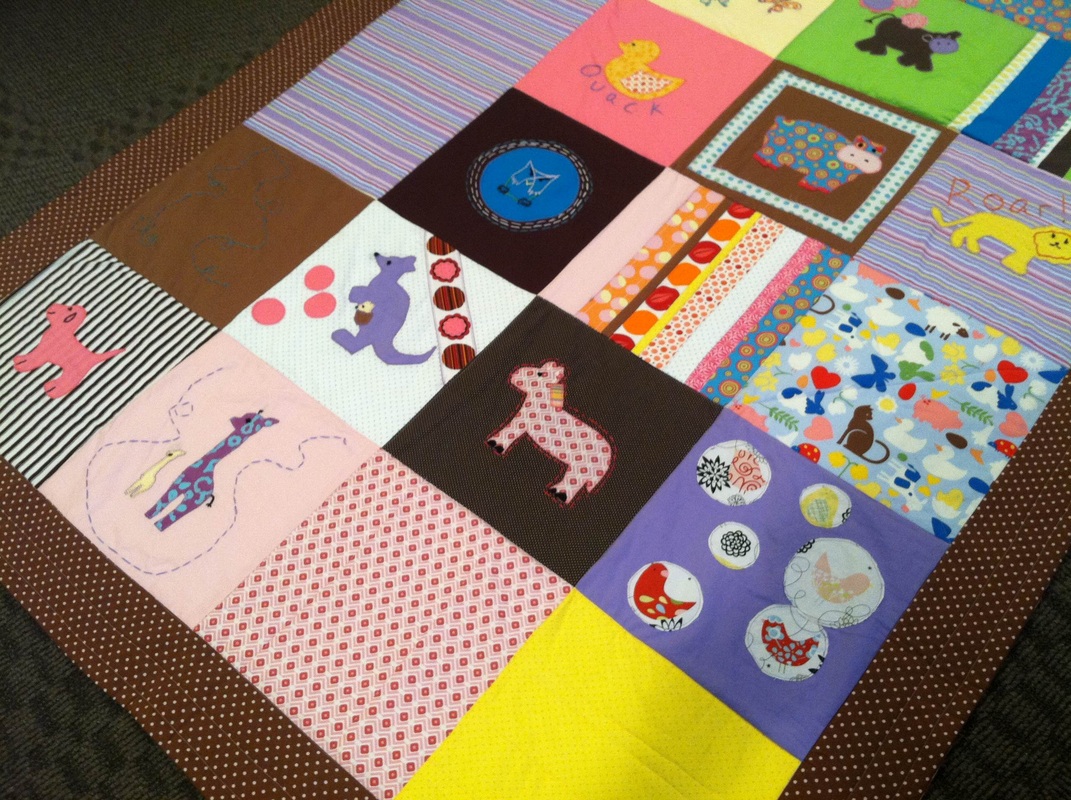
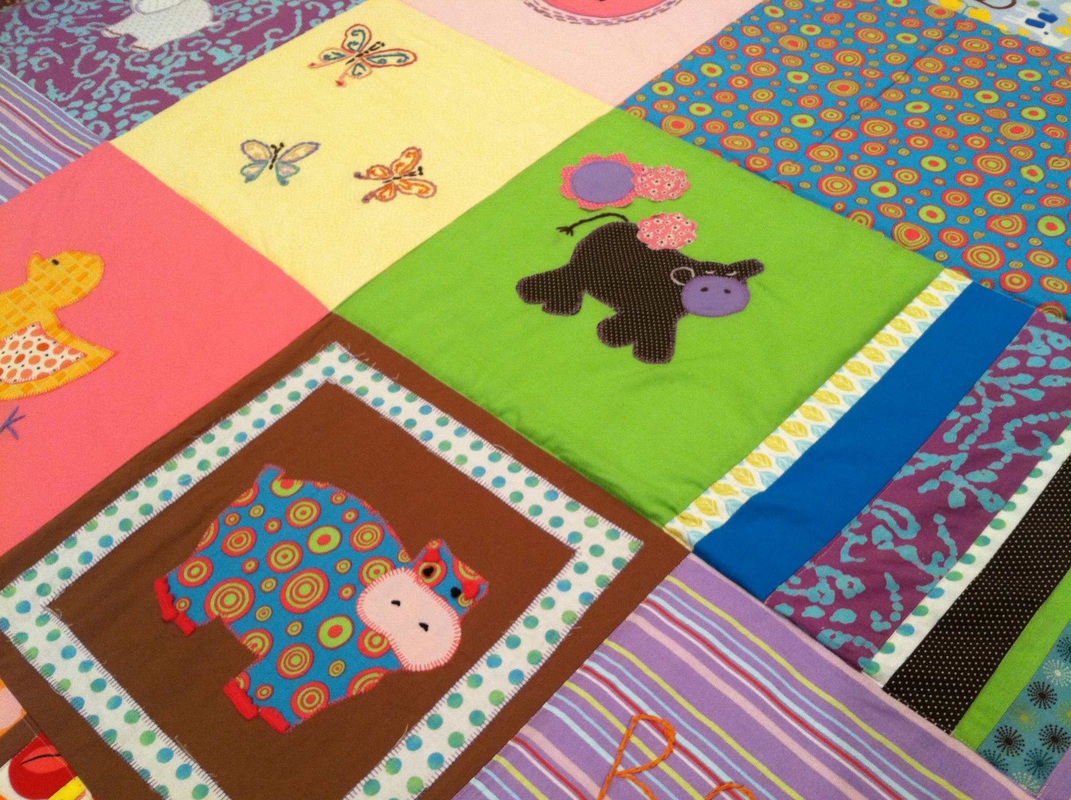
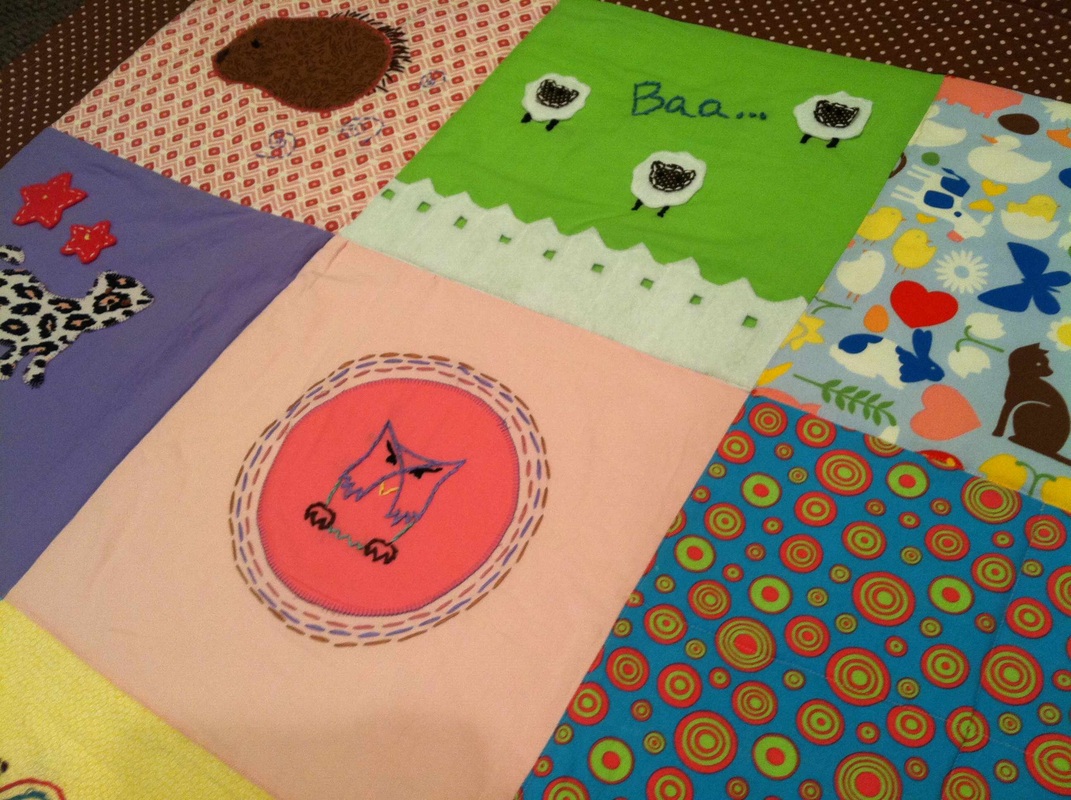
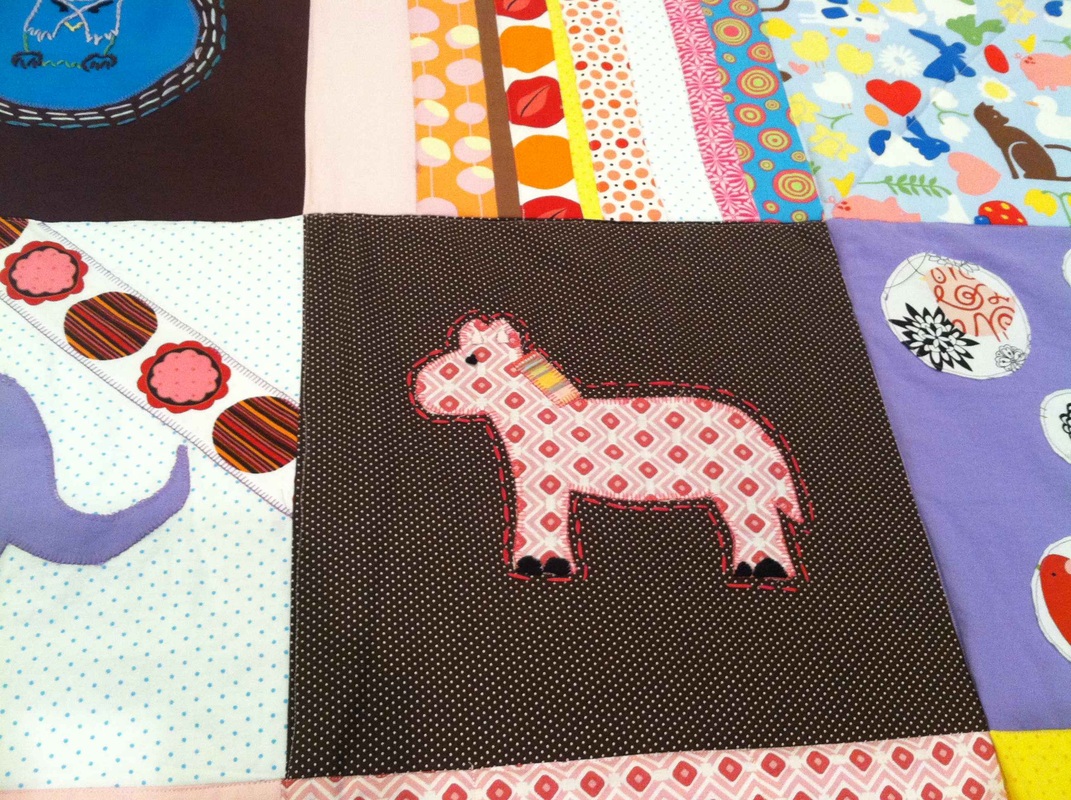
Last year, I made a Clifford quilt for Max for his 2nd birthday for his big boy bed. When my mother-in-law saw how much Max loved the quilt, she asked if I’d make one for my niece G. for Christmas (which falls right before her 2nd birthday and her move to a big girl bed). I consulted with my sister-in-law on what my niece would like, and we decided G. would love an animal theme. Farm, circus—whatever, it was all fair game. The only requirement was a hippo—G.’s favorite animal. I had made a small animal-themed quilt for my friend Kate several years ago, so I re-used many of the appliques that I had found in the book B is For Baby by Suzonne Stirling: the zebra, the hippo, the tiger, the lion, the kangaroo. I also found some good ones in 100 Applique Motifs by Deborah “Ismoyo” Green, like the elephant, the sheep, the kangaroo, and the porcupine. For the embroidery (the owl and the butterflies), I turned to the classic, Sublime Stitching, by Jenny Hart. And finally, I searched online for images to make the rest of the appliques, modifying them.
I used the satin stich on my machine to do all the appliques. I also did some raw edge appliques for the flowers and the bird cutouts (those are from a piece of fabric I picked up at Hobby Lobby a few months ago). The quilt looked a little flat the first time I laid it out, so I punched it up with some embellishments, like giant polka dot cut-outs and flowers. I also added some blocks made from strips pieced together. But my favorite thing to do was the hand-embroidery embellishing. I love sewing and applique, but there is something so relaxing about the rhythm of hand embroidery; it’s a great way to chill at the end of the day. I never did a final measure, but the blocks are each 12 inches (4 across and 7 down, except for the two places where I did 12 x 24 blocks, just for variety) and the border is 5 inches. I had so much fun making this quilt! I’ve got another year until my own little one, Georgia, is in a big girl bed, and I’m already thinking about it . . .
Have a great holiday, everyone! A shout out to all of you who bought Sew Retro as a gift this holiday season. Remember, if you want to buy a signed copied directly from me, you can do so right here, and if you want to keep up with business announcements and the like, head over to Facebook and like the Sew Retro page and my business page.
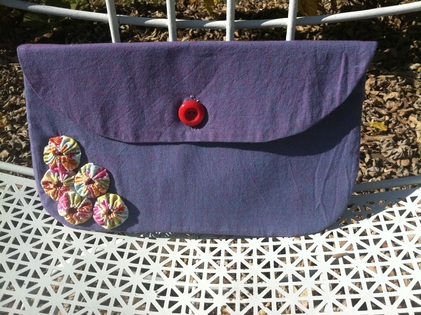
I finally put up my newest free pattern: The Ladies Who Lunch Clutch! I love the retro-ness of "ladies who lunch"--although I can assure you, I am in no way a lady who lunches (I usually just shove hummus in my mouth in between writing and editing projects). But it's a fun thought, nonetheless. The pattern is available as a Bonus Project, right here. You might be interested to see my first attempt at making this clutch. I originally used fusible fleece (a favorite of mine), which made it too bunchy and difficult to smooth. Turning up the curved edges was sort of fun and funky, but it was also too uneven. I didn't do a very good job smoothing and aligning all the curves and corners. And it was a little overdone with the flower embellishment.
There was still something charming about that version. But it needed to be edited and remade (I used medium weight interfacing the second time around). I like my newer version better. It's often good to forget about something for a while, and then revisit. Anyway, download the pattern and see what you think! Email me a link to pictures if you make a version!
First day of school: is there a sweeter concept than that? Especially after a long, hot summer. And an even longer Labor Day weekend.
I’ve accepted that I’m in a phase in my life where weekends just aren’t the leisure and loveliness they used to be. For example, 3-day weekends that alternate between so hot you can’t even go outside to freezing and raining, and involve a very busy 1-year-old, and a 3-year-old who still hasn’t quite gotten the hang of pooping in the toilet, really aren’t very fun.
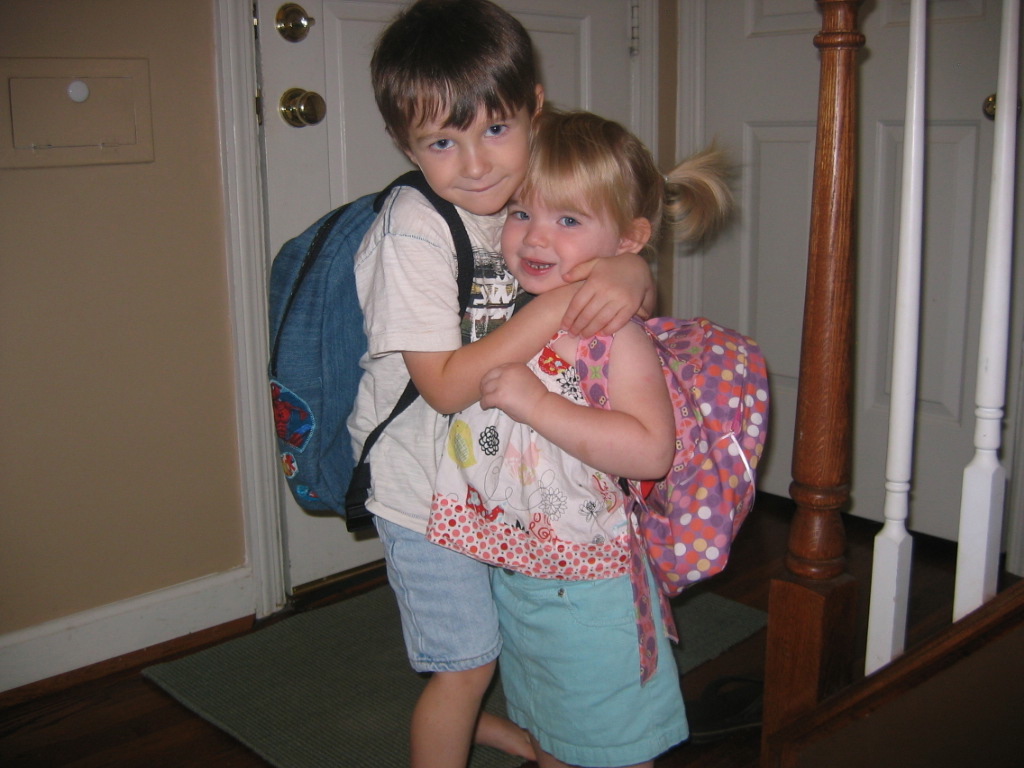
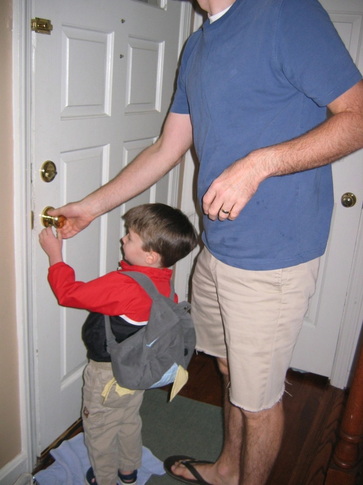
So I was thrilled to go to bed last night, and know that today, we could start over! It did feel like a fresh start this morning, as Max headed off to preschool with daddy, with his backpack strapped on his back like he knew exactly what he was doing. Was I thinking: “ooh, my sweet little boy! I will miss him so much! How has he gotten so big, so fast?”
Um . . . no. I was thinking: “I am so glad I get to head upstairs and get back to work. And damn, that’s a good-looking backpack!”
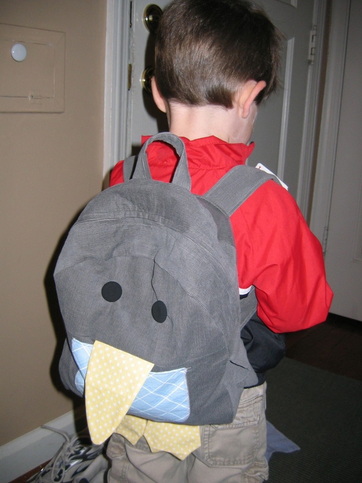
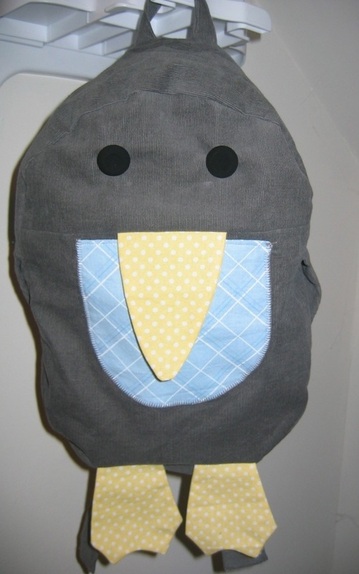
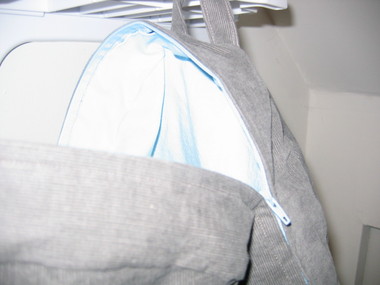
It’s a pattern from Oliver + S Little Things to Sew. I am digging this book sooo much, and I’ve already got about 6 other projects dog-eared. Max zeroed in on this backpack immediately. There was no “hmm, well, maybe, but can you make it out of Scooby-Doo fabric?” It was: “I want THAT backpack, mommy!” 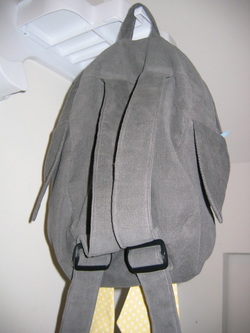 I pretty much matched the colors of the pattern: I picked out a grey corduroy for the body, a blue with a subtle diagonal plaid for the front pocket, and a yellow with a small white dot for the beak and feet. I lined the whole thing with basic light blue cotton broadcloth. I had a hard time finding the right-size strap adjusters at Jo-Ann’s, so I ordered some from Hardware Elf (they came within just a few days).
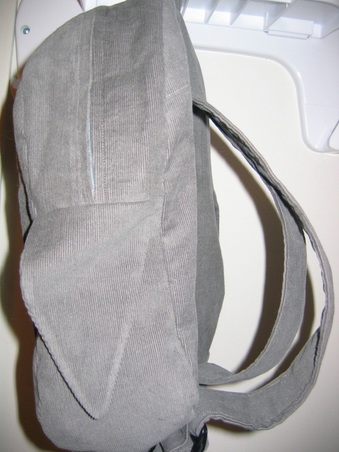
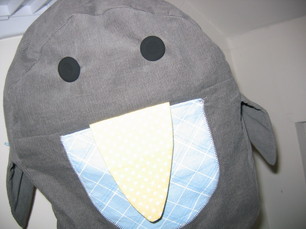 Overall, it’s really a fantastic pattern. There are a LOT of pieces (more than a dozen). As I was tracing the pieces and cutting them out, I began to wonder if I was in for something way more complicated than I anticipated. But it’s actually a very simple pattern, with very, very clear and smart directions. In fact, I learned a new way to make an outside pocket even cleaner at the top. The whole backpack is constructed beautifully—lined and reinforced in the right places. The directions for the zipper are good, although I sort of followed my own method (but don’t be intimidated if you’ve never done a big zipper—it’s super easy, I promise).
I wish it were just slightly bigger (the preschool instructed us to make sure the kids’ backpacks were big enough for their “homework” folder—and this one is, but just barely).
Overall, I can’t recommend this pattern enough for a kid's backpack, whether you want to do the penguin, or leave off the beak and feet and pick out a snazzy fabric.
And now, I’m going to enjoy the remaining hours of peace before I hear little feet scampering back inside . . .
I’m slowly emerging from one of the craziest months of my business. I had this idea that I would finish up my big project and relax this week. But . . . that didn’t happen.
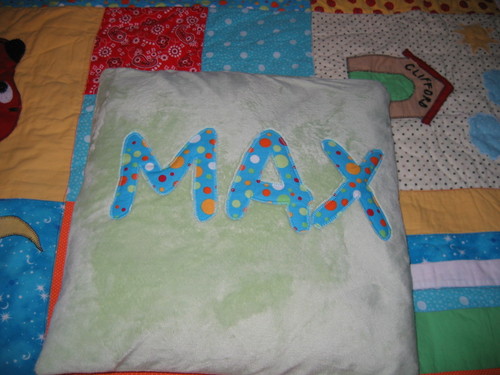
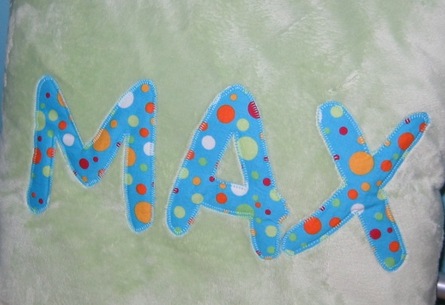
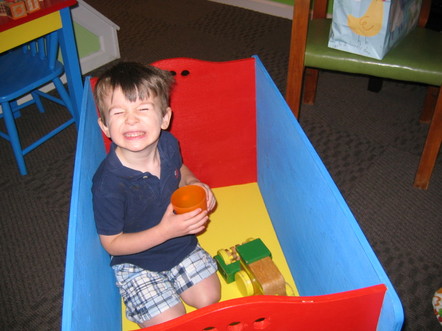
But I did make time Thursday night to watch Project Runway! Thursday was also Max’s birthday, so I snuck about an hour on Wednesday to make this little pillow for him, so he could wake up with it Thursday morning. He’s had this not-very-cuddly brown pillow I made a long time ago in his bed for the past few months. It’s got icky glue patches (where the embellishments fell off) and doesn’t exactly say sweet slumber. I asked him if maybe I could make him a special soft pillow instead, and he was all about it.
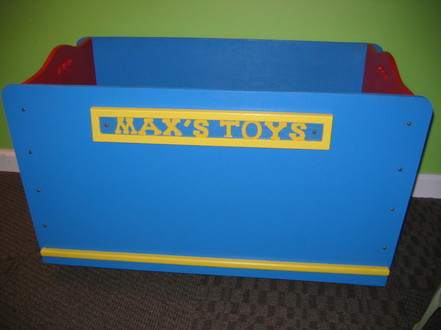
So I rooted through my stash and found a scrap of some ultra soft green stretch veloury stuff. My pillow form was 16 inches, so I cut two pieces, front and back, 17-inches by 17-inches. I used a scrap left from the Clifford quilt to make the letters of his name. To prevent the velour stuff from stretching when I appliqued, I applied some lightweight fusible interfacing on the back. Then, I did a simple machine applique (a blanket stitch) around the letters. Not my best work ever, but a good last minute gift for a 3-year-old. I decided to do a zipper close (following the method I talk about here), stitched up the sides, inserted the pillow form, and the Max pillow was done! I put the pillow onto his bed after he was already asleep Wed night so that he could wake up with it the morning of his birthday. He loved the pillow, although the wooden train cars, Busytown cards, and set of kid-size tools were probably the bigger hit. He also loved the toybox that my father-in-law made (which matches the table that my husband built that I blogged about last week). Next up on the list is a new backpack, since he starts preschool in September. I’m going to use the penguin backpack pattern from Oliver & S’s Little Things to Sew. Have you seen this book? It’s unbelievably adorable!
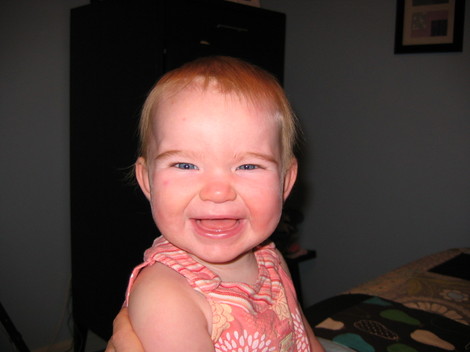
And eventually, I’ll get around to sewing some girly wonderfulness for Georgia. Her first birthday is coming up in about a month. I mean, seriously, look at this face! In other news, I should have some exciting news to share about Sew Retro soon (I need to make sure all the details are confirmed first). And, on the copywriting side of my business, my new web site is just about to launch (it will be the same domain as my original site, judiketteler.com, and I’m getting rid of jkcopywriting.com). I’m way excited about the design and some of the new aspects of my writing business.
More on that later . . .
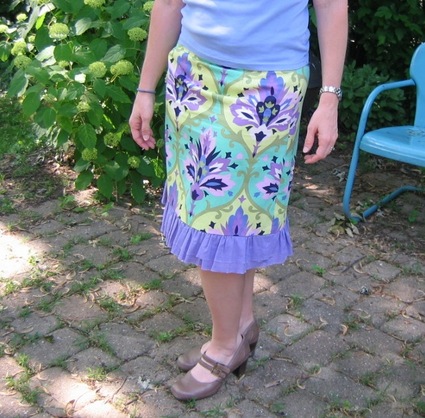
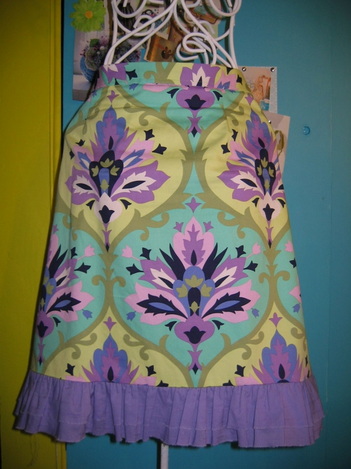
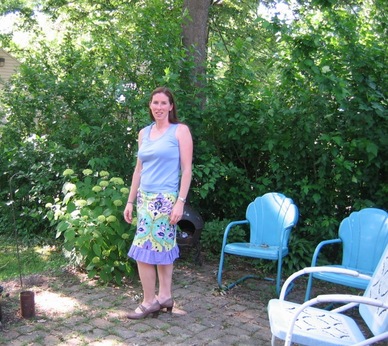
I love skirts in the summer, and in my dream life, I would make a skirt a week! But my skirt-making time is limited these days. Still, I had time to make this one, based on the Saturday Afternoon Skirt in my book. I actually intended to make the A-line pattern. But once I cut it out, I realized that the home dec fabric I picked out (Amy Butler’s “Trumpet Flowers”) was too heavy and didn’t look right as an A-line. It was much better suited as a straight skirt, with a full ruffle at the bottom. So, I followed the directions in my book, but instead of angling the side seams out on each side, I just made the seamline go more straight down from the hips. 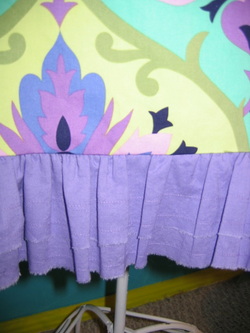 For the ruffle, I used a quilter’s cotton broadcloth from Jo-Ann’s. I wanted the ruffle to be extra full, so I made it two layers (the top one is 3 inches long and the bottom is 4 inches). To get the measurements, I measured around bottom of skirt and doubled it, to allow for gathering. I think that was about 90 inches, but since I was seaming together two complete widths of the fabric, which was more like 43 or 44 inches, the final circumference wound up being more like 86 or 87 inches, which is fine.Some more specifics:
- Since I wanted raw edge, I ripped my pieces. To rip, you just make a little cut at the selvedge and then start ripping. It will rip straight, and it gives a really nice evenly frayed edge. (Always rip a straight line first.) I ripped four pieces across the full width: two pieces that are 3-inches by 44-inches (or whatever the width wound up being after washing) and two pieces that are 4 inches by 44 inches.
- It’s easiest to layer the pieces and take the side seams at the same time. Place each 3-inch piece on top of each 4-inch piece and stitch together at each end (right sides together, so 3-inch piece to 3-inch piece). You’re creating one big circle.
- I wanted some stitching detail on the ruffles for a textured look, so I took a few rows of straight stitches (two rows on the top layer about one row on the bottom layer).
- Then I pinned the layers together at the top and took a gathering stitch. I started at one side seam, stopped he stitching when I got to the other side seam and then resumed on the other side of the seam.
- Then, with right sides together, I matched the side seams on the ruffle and skirt and starting gathering. I evened out the gathers, pinned, and stitched.
- It takes a good pressing to make the ruffle lie flat. I love the finished effect and the fullness of the ruffle layers.
Quick addition to this post: 365 Days of Sewing is now running a giveaway of Sew Retro! Go here to enter the contest and read an interview with me.Anyway, back to the original post . . .Max’s toddler program wrapped up last week, and now he is off to summer camp (at the same school) this week. It’s just three days a week from 9 – 12, but any chance we have to get the kid outside and running around is welcome. He goes for two other weeks during the summer. Not enough, as far as I’m concerned. But my checkbook had the final say.
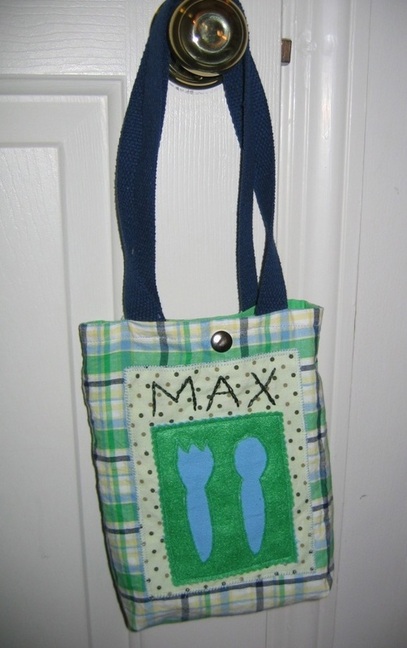
Since the camp includes packing a lunch for the kiddos, I figured it was time that Max had his own lunch bag. So of course, it seemed brilliant to embroider his name right on it so there’s no worry about mixing up lunch bags! 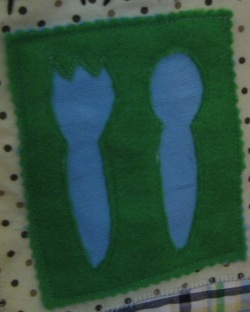 I also wanted to try the reverse applique technique on a small scale. I used a pattern from 100 Applique Motifs, but did the more traditional method of reverse applique—where you stitch on the backside of the fabric you want to show, and then flip it over and cut very close to the stitching on the fabric that’s in front of the motif. I’ve dabbled in this, but never done a project using this method. I love it, because it feels a little magical, like a slow unveiling of something. I used craft felt since I wanted a clean edge versus the frayed look I often gravitate toward.
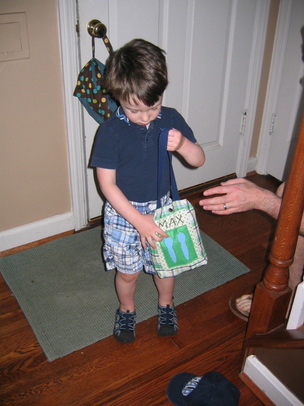
It’s a super simple shape: I just cut front and back pieces, and then front and back lining pieces, at about 9 inches by 12 inches. I sewed up the sides and bottom of bag and lining, and made about a 1.25-inch gusset in each. I used the method where you insert the lining (turned right-side out) into the bag (turned wrong-side out, so right sides are together) and then sandwiched the handles in the seam. Then I sewed the top edges together, leaving about a 3-inch opening at the top for turning. Finishing is quick: Turn it, press it, slip-stitch the opening closed, top-stitch (if you want), and add a snap fastener (or sew on a snap or use Velcro). However, I realize now that I should have made the handles shorter (so the bag isn’t dragging the ground if he carries it).
I would love to see a dozen or so two- and three-year olds sitting around a table, pulling out goodies from their lunch bags and eating lunch. Actually, I’m 100 percent sure that I wouldn’t be able to handle such a scene. But I am thankful that there are wonderful summer camp teachers out there who are excellent at wrangling children and their yogurt-smeared faces and sticky hands.
Yay for homemade lunch bags, wonderful teachers, and summer treats!
I’ve been dreaming of the day that Max could play in my office/sewing room while I worked on projects. But it’s a room full of pins and scissors and computer wires and files and things that are generally not toddler-friendly. So although I’m always desperate to catch up on projects on the weekends, my sewing time is pretty limited during his waking hours, unless I sneak upstairs for a little while my husband watches him.
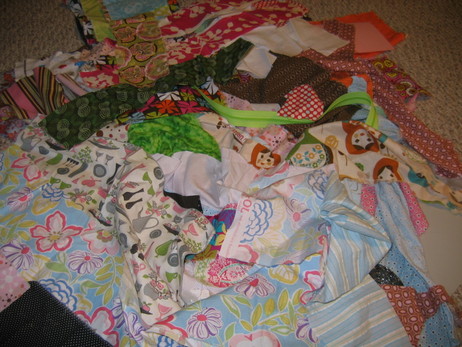
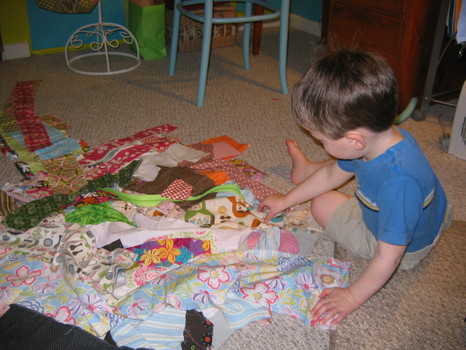
I should backtrack and say that Max loves anything to do with fabric, and is always desperate to get into my office. I often let him rifle through the scrap basket for a few minutes, hunting for a new treasure to add to his scrap pile. He loves to “help” me sew when I bring handwork downstairs into the kid-friendly space. This past Sunday morning, when I told my husband I was going upstairs for a few minutes to sew, Max grabbed his pile of fabric and ran up the steps after me. “I want to sew with you!” he cried.
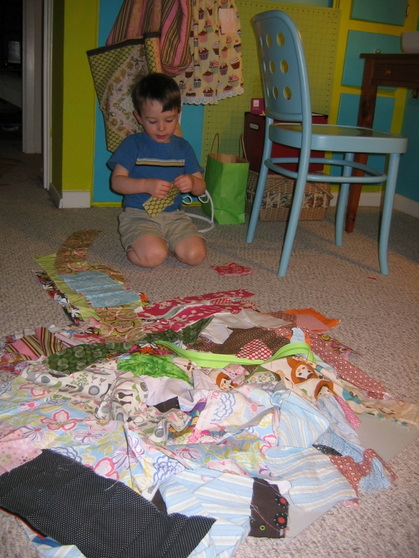
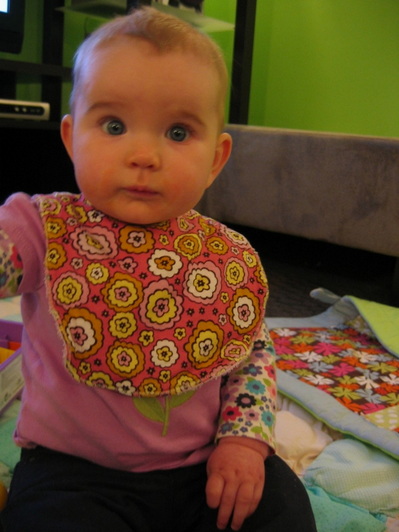
He promised me that he would follow my three rules: (1) no pulling fabric or books off the shelves, (2) no grabbing pins or scissors, (3) no grabbing computer cords or wires. I figured I’d give it a try. And you know what, it was pretty great! He had a ball with scraps and “making” a quilt. He actually followed all my rules (for the most part—I did have to remind him 1 or 2 or 14 times). Look at the beautiful pile he created! He was very proud. 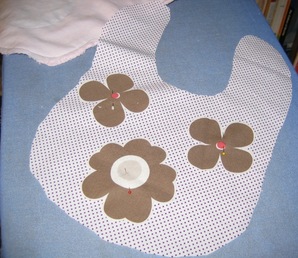 While he made his "quilt," I managed to start working on some pretty bibs for Georgia—a simple project that’s been on my to-do list forever, but I can’t ever seem to get around to. She gets stuck wearing her brother’s cast-off blue bibs with baseballs and dinosaurs. Of course, girls can love baseballs and dinosaurs too, but pretty girl bibs match her pretty girl outfits so much better!
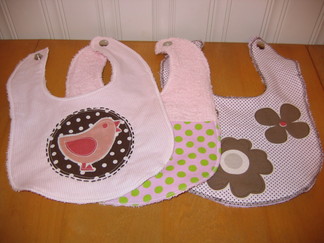 Altogether, I made four (three pictured here, and the one she’s wearing below). I created the pattern from an existing favorite bib (just the right size and shape for maximum drooling coverage, and not too tight around the neck). You can probably just look at it and figure out the directions yourself (super basic--a great "first" sewing project for a new sewing mama), but I created a quick bonus project here, with directions and a template you can download. I love that you can make the bib very simple (just a cotton print backed with terry cloth), or you can do fun appliques, which is what I decide to do on a few of them. You can also piece them. I just did two pieces. But you could sew small squares together and create an entirely patchworked bib!
I still don’t know that I’ll bring Max up here if I have a project that requires extreme concentration (or ironing, since I definitely don’t trust him anywhere near a hot iron), but it’s good to know that my boy and I can hang out a little bit up here and each do our thing.
We’re transitioning (albeit slowly) into a culture of re-purposing, which is really pretty awesome. Like everyone else, I’m trying to find my way and see the creativity and possibility in the things I used to just throw away or donate.
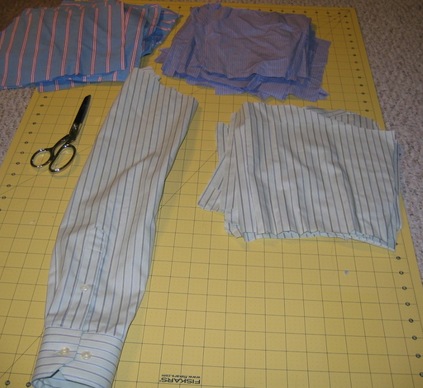
That’s what led me to grab a bunch of shirts my husband was getting ready to give away. Before, I would have just piled more stuff into the giveaway bag. But instead, I realized that these weren’t just old shirts. They were fabric! Sorta fabulous fabric, actually (I’m a sucker for prim-looking pin stripes). There was definitely possibility, I just wasn’t sure yet. The first thing I did was to cut them up for a make-and-take I did at this year’s CHA (embroidered hearts for Valentine’s Day cards--see the tutorial here! That was fun, but I still had an awful lot left, including all of the button fronts and sleeve cuffs I’d cut open.
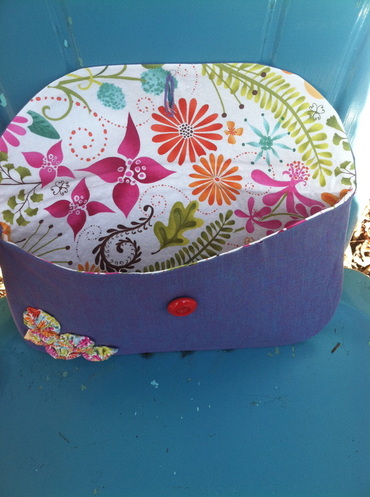
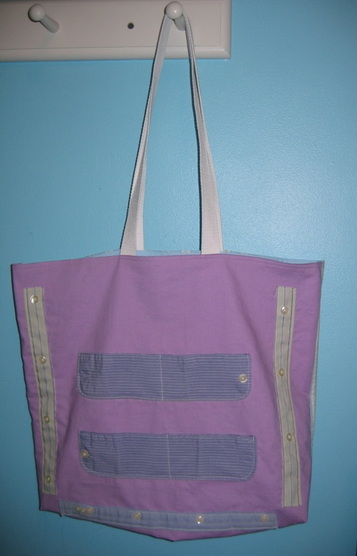
I was playing around with the leftover pieces, and I started to arrange them onto a solid lilac fat quarter (another little piece of happiness that was part of a fat quarter stack I ordered from Anna Maria). And that’s how I wound up with this fun tote!
The specs:
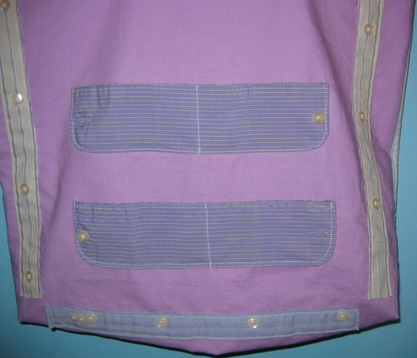
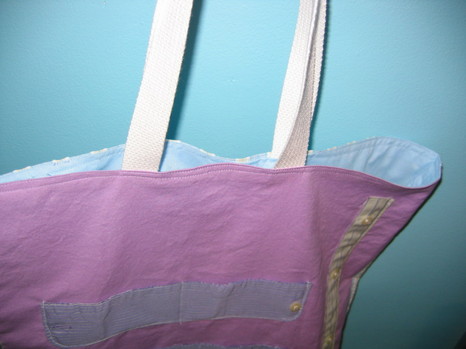
Easy! I cut the fat quarter to be about 19” wide by 16-1/2” high, and I pressed the top edges down 1/2”. Next, I added my menswear trimmings. The two pockets are made from sleeve cuffs, cut open, and the strips on either side and on the bottom are made from the button-front of the shirt. I just took a basic straight stitch (by machine) all the way around each piece, as close to the edge as I could get. Raw edges only add to the charm of this, as far as I’m concerned. I also left all the buttons on, just because it looks cooler that way! I did take a row of stitching down the center of each cuff pocket, to make the pockets a little more functional (you could also add Velcro or a snap if you wanted the pockets to close). For the back, I used seersucker leftover from the “magic” quilt I made for my bed, (which I’ve written about on AOL’s ParentDish, right here) I stitched bag front to bag back, and then made 1-1/2” gussets on either side (click here for a gusset tutorial). 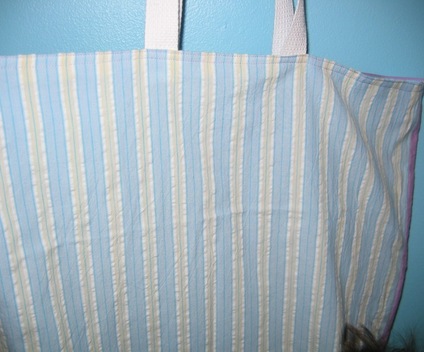 The seersucker back. Note the wild tuft of hair at the bottom right (Max insisted on standing right there as I took the picture). I lined it with a light blue cotton I had on hand, just cutting the lining pieces to the same dimensions as the bag and assembling in the same way, including pressing the top sides down 1/2”. That way, when you insert the lining into the bag (you turn the bag, but don’t turn the lining), the pressed edges on both the bag and lining line up. Sandwich your handles in between the layers, and then stitch all the way around to close up the top, right next to the folded edges, and then again about 1/4” away. (After the fact, I wish I had lined it with fusible fleece, which is what I often do, since it adds body. Ah well.) I made this bag for a friend of mine, to thank her for passing on a valuable writing lead. You know who you are, my dear friend, and thank you!
|


 RSS Feed